On this page:
|
|
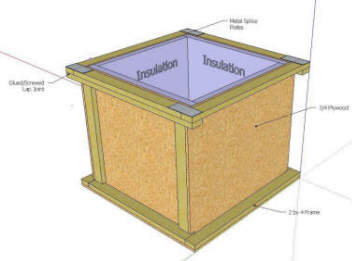
The basic tank box is plywood with carefully
constructed 2 by 4
reinforcements.
From here, the inside gets high temperature insulation and then an EPDM rubber liner. An insulated and tight fitting lid completes the tank. While the tank construction is simple carpentry, there is a lot of water pressure on the bottom and sides, and the tank must be built with some care. The tank is filled with plain water, and the water in the tank never changes after the initial charge -- it is used strictly to store heat. This is actually the same tank I have been using on my $1K Solar Water Heating System, with a few small changes to add the space heating function. It would have been nice to add somewhat more volume to the tank, but the existing tank is in very good shape, and while the volume is on the low side, its OK. See the Overall Design section for information on sizing the tank. |
You will need to work out the dimensions for your tank so that it will have enough storage for your collectors, and so that it will fit in the space you have available.
This is what we did for our tank:
None of this is at all critical -- within reason, you can change the dimensions to suit your space. If you want to use the 300 ft coil of PEX heat exchanger (see below), then the inside of the tank can't be a whole lot less than 35 inches across.
Be sure to allow enough vertical for the lid and clearance to remove it -- about 8 inches is just adequate.
Note that if you use a full sheet of plywood for the base, and full sheets for the long sides, you can get the inside dimensions up to about (35 wide)(83 long)(44 high)/(231 in^3/gal) = 553 gallons. This is typically enough to support 200 to 300 sf of collector area. For tanks of this size, some extra precautions must be taken with the tank structure -- see the Solar Shed tank for more details...
Note also that if your tank is to be located in a place where appearance is important, there are several examples of tanks with nicely finished exteriors in the $1K Example Systems... |
The tank location should meet all of these
criteria
Our tank is located in the crawl space on good, firm, dry dirt. The whole crawl space floor is covered with 6 mil poly to keep the humidity level low in the crawl space. The tank base sits on top of 2 inches of rigid foam board insulation (XPS), and and additional 2 layers of 6 mil poly. If anything shortens the very long life of these tanks, the most likely thing is moisture from the outside. With proper installation, the life of these tanks is measured in decades.
|
|
Tank located on firm, dry dirt and sitting on top of 2 inch rigid foam board insulation with 2 layers of 6 mill black poly under.. |
This section covers building the tank box and framing it, installing the high temperature rigid insulation boards, and then installing the EPDM rubber liner.
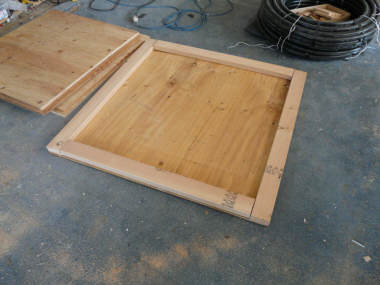
In my case, the finished tank is too large to fit through my crawl space hatch. So, the tank parts were cut out, and a trial assembly was done in the shop. It was then disassembled, and the pieces were passed through the crawl space hatch. The final assembly was then done in the crawl space. This is one advantage of this tank design -- a large tank can be installed in places with minimal access.
The tank walls and bottom are cut from 3/4 inch exterior plywood. The top and bottom peripheral frames that support the sides and hold everything together are made from good 2X4's. As you build the tank, bear in mind that it will hold about 1500 lbs of water, so work carefully, and pay careful attention to making good joints. This is really simple carpentry, but it must be done correctly.
You can adjust the tank dimensions to fit your space available and storage needs. Be sure to account for the volume of insulation that you will be adding inside of the tank walls when you make your tank capacity calculation. Another consideration in choosing the tank dimensions is that if you plan to use the pipe coil heat exchanger described below, you want the tank to be large enough to hold the pipe coil.
|
Building the BottomOn our tank, the bottom is made from a 4 ft by 4ft half sheet of 3/4 inch exterior plywood. 2 by 4's are used to form a perimeter frame around the outer edge of the base. These 2 by 4's support the lower edges of the tank sidewalls. They take a great deal of outward pressure from the sidewalls, and should be carefully glued and screwed to the plywood base. As mentioned above, its important that the base of the tank be kept away from any wet spots that may exist where the tank is placed.
|
|
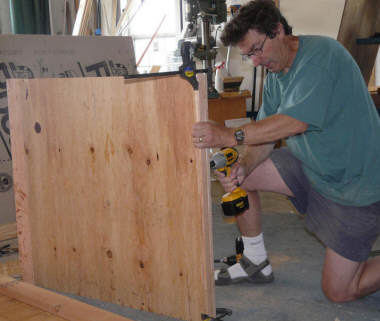
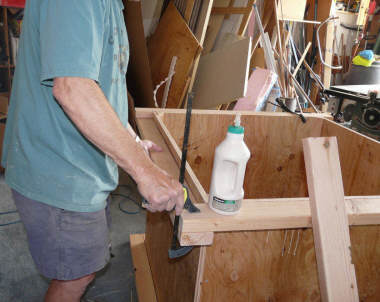
Build the Tank Side WallsThe tank sidewalls are made from more of the 3/4 inch exterior plywood.
The pictures to the right show the vertical edges where two sidewalls meet being reinforced with a triangular shaped wood member that is ripped from a 2 by 4. This method works fine, but the alternative method shown in the box just below seems simpler, easier, and structurally better, so I'd consider using it.
|
|
The tank sidewalls in place on the bottom frame. The top peripheral frame has not been installed yet. |
An alternative way to do the corner reinforcement:
This diagram shows a stronger and easier way to reinforce corner where
the tank walls come together. You basically make two of tank
walls longer than the other two. This allows the joint to be
reinforced on the outside of the tank. This makes for a stronger
joint, avoids cutting those triangular shape inside reinforcements, and
makes it easier to fit the insulation in.
|
Build the Tank Perimeter FramesThe pictures to the
right show the upper perimeter frame. This frame supports the top of
the tank walls, and provides a flat surface for the lid to seal down
on. Use 2X4's without a lot of defects in them. The lap joint shown
provides a good strong joint which is needed to resist the water
pressure. This lap joints should be carefully glued and screwed with a
high quality waterproof glue. The upper and lower peripheral frames that support the tank sides are very important. They are resisting a lot of water pressure -- the water even in this small version of the tank weighs about 1500 lbs. The lap joints shown for the top frame provide the needed shear area for a strong joint.
This lap joint results in the 2X4's on two sides being down 1.5 inches from the top -- to make a level surface for the lid to seal down on, just add another section of 2X4 on these sides. Then add metal splice plates in the corners to further strengthen these joints.
Note that if you build a larger tank with longer sides, then tension ties should be used to tie together the middle of the 2 by 4 perimeter frames on the long sides. See the Solar Shed tank for an example...
|
|
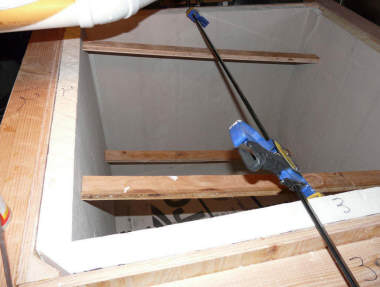
Install the Inside InsulationNext, the tank insulation
panels can be fitted. Cut and install the bottom sheet first. Then cut the side pieces and install them. I used a little Great Stuff polyurethane foam to tack them in place, but once the tank is filled, the water pressure holds the insulation in place. Fill any gaps or
cracks with Great Stuff. Make sure that there are no cracks or
shape edges that the EPDM liner will get pushed into by the water
pressure.
|
|
The sidewall insulation pieces propped into place until the "Great Stuff" cures. |
It is also a good idea to give
everything a coat of primer and exterior paint. I only painted the base on
mine because the area my tank is in is dry, but I should have painted all of it
inside and out.
If you are going to be moving
the tank to a place that has difficult access, then its probably best to
cut the pieces out and do a trial assembly in the shop without actually
securing any of the joints permanently. When you are satisfied
that everything fits, then take it apart and move it into the area its
going to live in and do the final assembly. In my case, the tank was going into a crawl space where the only access is the hatch shown in the picture. I had to cut the base plywood in half to get it down, but spliced it back together, and then glued and screwed the uncut edge frame 2 by 4s on.
|
Down the hatch with all the parts. |
A single sheet of EPDM rubber roofing or pond liner is used to line the tank. If the liner is installed carefully, it will last a long time, and will hold up well to high temperatures. I have heard from people who have had one of these EPDM lined tanks since the 80's , and are just getting around to replacing the original lining. While the liner can take temperatures of 180F and even more, it will have a longer life if the tank temperatures are limited to about 170F.
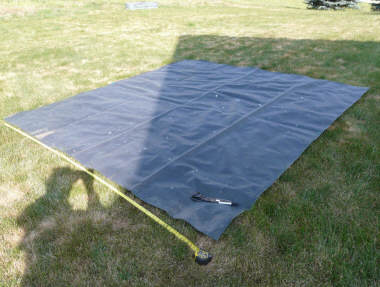
Determine the Size of the Lining & Cut it OutCut the EPDM liner so that a single piece can be used for the entire liner.
The liner dimension are about:
The 10 inches allows for the EPDM to lap over the top of the insulation and the peripheral frame. This is important, as the EPDM provides a sealing plane for the top to fit on.
Lay your EPDM sheet out on a big flat surface (like the lawn). Mark of the dimensions established above, then check them, then check them again, then cut the EPDM with a pair of scissors.
Before you fold up the EPDM, mark the center of each side with a marker or tape. This make make it easier to do the final installation in the tank. If the tank is rectangular, mark which side is the longer one. |
Installing the LinerMark the mid points of each side of the
wood upper tank frame with a marker.
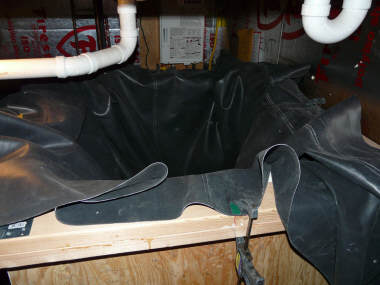
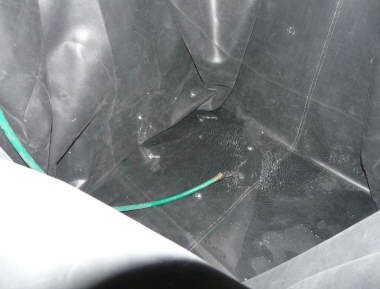
This will look like a real mess when you start, but just work all the excess material into a single fold at each corner. Some clamps are helpful to keep things in place. Make sure that there is enough slack in the EPDM that it won't be stretched by the water pressure -- you want the liner to bear against the tank wall everywhere -- no bridging. There will be fold lines in the EPDM -- this is OK.
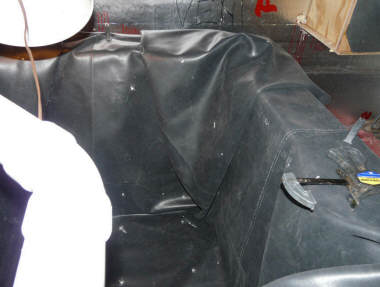
When you get things in place, climb out of the tank, and put about half a foot of water in -- then work the EPDM around and make certain that the EPDM is supported by the tank walls and bottom with no bridging. Once everything is the way you want it, run a bead of silicone between the EPDM and the top frame, and then staple around the top edge with stainless steel staples. The staples just hold things in place until the edge boards are installed in the next step. Note on water used to fill: If you have hard water, it is a good idea to fill the tank with demineralized water or to collect rain water and use that. Doing this prevents scale from building up in the plumbing and in the collector. It is possible to make waterproof seams in EPDM using available seaming products. Using this technique, you could make a custom shaped liner that fit the tank without the need for all the folding mentioned above. I strongly recommend against this based on one person very experienced with EPDM and seaming trying this and having the lining fail immediately.
|
|
Work the excess material into on big fold at each corner. Clamp or tape things in place at the upper perimeter frame. |
|
Add about 6 inches of water, and make sure that the EPDM is flat against the sides and bottom. |
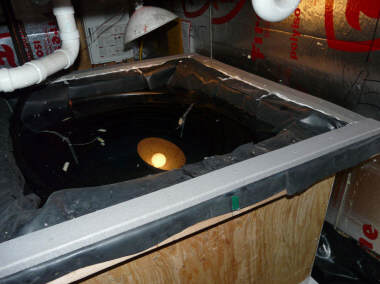
Installing the Edge BoardsAt this point, you want to install an edge board all the way around
the ledge on the top of the tank. The board holds down and seals against
the tank liner you just installed, and provides a flat plane for the lid
to seal against. I have been using the plastic deck boards that lumber
yards sell for this. It seems to hold up to the warm hot conditions
inside the tank -- much better than wood. Once the surface of the EPDM covering the top frame of the tank is
fairly even, put a bead of silicone around the top frame, then screw the
edge board down over the silicone and EPDM. Use either stainless steel
screws, or coated deck screws to prevent corrosion.
|
|
This shows the edge board installed and sealed down to the tank top frame. The edge board is a plastic deck board. |
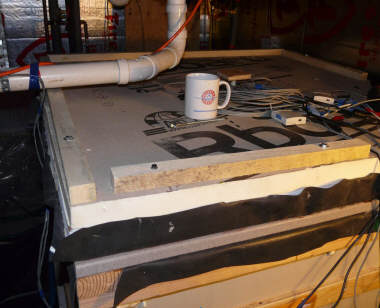
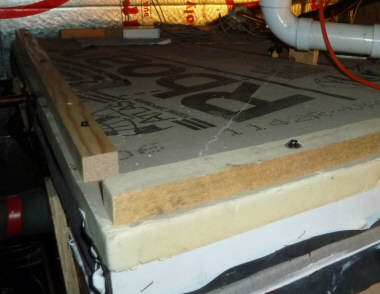
The lid is important. It must seal down to the tank well, otherwise it
will leak a lot of water vapor out, which is a big heat loss and also
not good for your crawl space or basement. The lid also provides the
insulation to prevent conductive heat loss out the top of the tank. It also serves the critical safety function of keeping pets and kids out of the scalding hot water. For all the reasons listed above, the lid must be well secured to the
tank. Wood strips along the outer edge of the tank are screwed into the
tank upper frame to compress the lid tightly down on the tank edge
boards. |
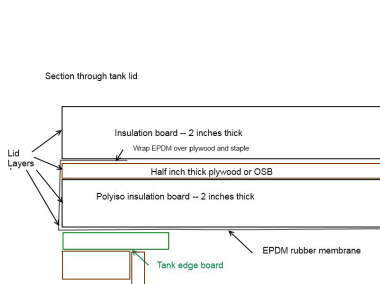
Cut out the lid layersThe lid is large enough to go to the outer edge of the edge boards
you installed earlier. The top layer of insulation can be any type, but the lower layer
should be the Polyisocyanurate insulation due to the potentially high
water temperatures in the tank. Glue the lower foam board insulation to the plywood lid using the polyurethane foam in a can. Use some weights on the plywood to keep the foam from expanding until it sets. Place a piece of EPDM that is about 10 inches larger than the lid on the floor. Put some dabs of silicone calk on the EPDM, and then place the lid with the foam board down on the EPDM leaving about 5 inches of EPDM lining sticking out on all edges. Now wrap the EPDM up around the edges and staple the EPDM to the top of the plywood. Now place the 2nd layer of insulation on top of the plywood and anchor it with Great Stuff foam.
|
Install Lid with Hold Down BlocksThe lid is compressed tightly down onto the tank edge boards by boards resting on the top of the lid in the picture. Long screws go all the way through the hold down board, tank lid, tank edge boards, and into the tank perimeter frame. These 6 inch screws are tightened firmly press the tank lid firmly down onto the tank edge. Around here, these long screws are sold a "log screws".
|
|
Plumbing Connections Through Lid (or not)On my tank, some of the plumbing connections between the tank and the collector go through the lid. The part of the lid that these connections go through is permanently sealed to the tank. In my case, I used a triangular shaped piece at the corner of the tank closest to the collector for this fixed portion. Note that it would be quite feasible to run all the plumbing connections to the tank through the edge boards in the same way that I now for most of the connections. If I had it to do over, I would do it this way, and just make the lid a single, removable piece. The lid has a half inch CPVC pipe through the EPDM liner and up through the lid. This half inch penetration also serves as a point to check the level of the water in the tank, and also to top up the tank if needed (very rare). When the half inch pipe is not being used to measure tank level, I cover it with a piece of tape that has a small hole it it to provide venting of the tank.
|
|
Half inch CPVC pipe through lid vents tank, and serves as depth gauging point and fill point. |
I want to make it clear that I am not a tank designer, and that the water loads in these tanks are substantial -- so, do your homework, and be careful about going beyond the designs that have been shown to work. These notes on the Solar Shed tank give some idea of the magnitude of the loads these tanks have to deal with...
Another area to be careful about is that the water in these tanks can be very hot. Hot enough to be fatal to kids or pets that fall in. So, be certain that you have a strong lid that is well secured to keep the tank safe.
Gary February 10, 2011