Tank to collector plumbing -- Tank End
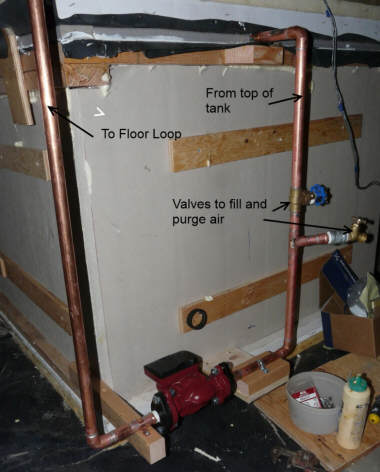
Fluid is drawn from the bottom of the storage tank, up over the tank
wall via the U-Tube, and then down to the pump mounted as low as
possible. The pump outlet pipe makes its way to the lower right
corner of the collector (see section below).
The pump mounts with flanges so that it can be easily removed.
The valve to the left of the keeps water from being syphoned out of the
tank when the pump is removed. It would be good to have a 2nd
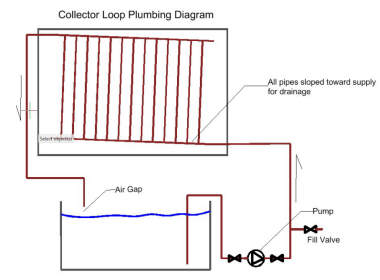
inline valve to the right of the pump like the one to the left as is
shown on the plumbing diagram.
The valve mounted off the T just to the right of the pump has a
garden hose thread, and allows the pump and U-Tube to be primed and
purged of air. To do this, hook up the garden hose to this valve,
open the valve, turn on the garden hose and let the water run long
enough to completely purge the lines of air. Once purged, the pump
should be very quiet -- if the pump is noisy, repeat the purge.
This picture shows the U-Tube that extends from the bottom of the
tank, up over the side of the tank, and down to the pump intake.
The U-Tube allows the pump to draw water from the bottom of the tank and
to retain its prime when its shut off without having to put holes in the
tank lining.
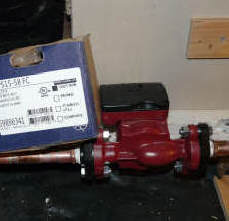
The pump is a Grundfos 15-58 3 speed, cast iron body pump. The
pump comes with a check valve installed -- this CHECK VALVE MUST BE
REMOVED TO ALLOW DRAIN BACK. For the longest service life, this pump
should have a bronze or stainless steel case, but I have had good life
with the much less expensive cast iron case pumps. With this system,
new water is not being introduced on a regular basis as with some open
systems, and this may be one reason that iron pump does OK.
I installed a flow meter in the supply line to be able to monitor flow
rate. The flow meter made a LOT of noise. When I checked
with the manufacturer, I'm told this can happen if the flow rate is just
right to match the natural frequency of the flow meter. I've taken
it out for now, but will try another with a different flow range. If
the flow meter is mounted at just the right level, it can also serve as
a sight gage for the tank water level -- very handy. I've temporarily
replaced the flow meter with a short section of galvanized pipe. |


