Search
The Renewable Energy site for Do-It-Yourselfers
Doug's Solar Home
Doug Kalmer has been "walking the
walk" on renewable energy and low impact living for more than 20 years.
Here he passes on information about his solar home and other renewable energy
projects as well as some thoughts on living with less impact.
Doug has provided material for
several of his projects on Build-It-Solar -- they are all listed at the end of
this page.

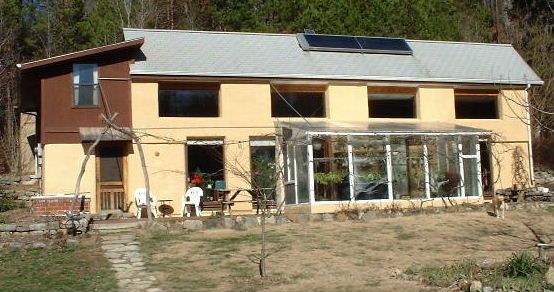
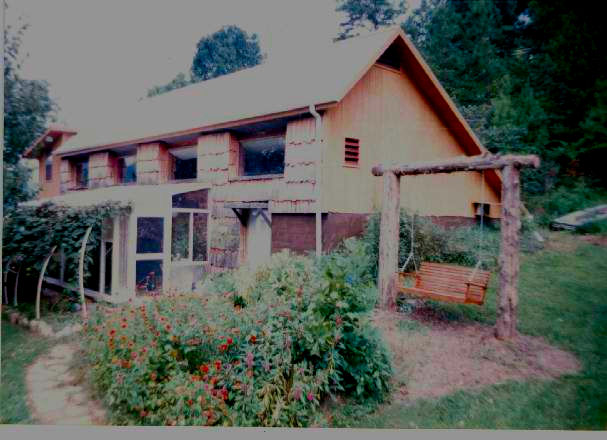
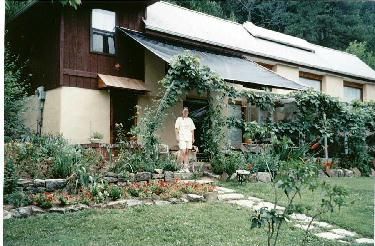
Doug's solar earth
sheltered, solar house in Tennessee -- built in 1985
About 20
years ago I bought a 2,000 square foot uninsulated house in upstate New York
which got me interested in solar space heating. After the usual insulating and
weather-stripping, I added an attached greenhouse and built a window box solar
space heater. These worked well enough to make me want to explore further solar
possibilities.
After reading everything I could on the subject, I decided to build a passive
solar earth sheltered home in Tennessee. I researched the subject by reading
magazines and books and visiting every solar building I could. The book that
gave me the best perspective on the history of solar design and its uses was "A
Golden Thread; 2,500 Years of Solar Architecture and Technology". I'd like to
give you a summary of what I've learned.
More on Doug's low impact, energy from solar lifestyle
...
In 1982 my wife and I bought 34 acres in Tennessee, and started to build our
dream home, passive solar space and water heating, earth sheltered, post and
beam framed, slipformed stone, with cedar cordwood infilled south wall. We had
some money from selling a house I remodeled, but funds were tight, so we did all
the work we could ourselves. We hired a track loader to excavate a 25' by 65'
recess into a south facing hillside, and then hand dug footer trenches, poured
15 yards of concrete in them, and started slipforming stone walls. We placed
locally gathered stone into the forms and mixed concrete with a gas mixer to
fill around the stone. Once set up, the form could be moved, using the same
forms over and over again to move down the walls.
I then felled and ripped posts and beams from oak trees on our property. I
also cut Eastern Red Cedar (Juniper) into 16" lengths to stack for drying. After
framing and decking the original shed roof, we poured another 15 yards of
concrete with the help of friends and neighbors for a slab. We floated the slab
surface for texture, and stained it a dark brown to improve solar absorption.
After 15 months of drying time, we could wait no longer for the cedar to
dry further, so we started building with it. First I built a shaving horse and
using a drawknife, I had to peel all of the bark from the cedar. I later learned
that if I had cut the cedar in the spring, when the sap is up, it would of
peeled more easily. Laying two strips of sawdust rich mortar along the inside
and outside of the wall, I laid the 16" cedar lengths onto them, filling the
inner space with insulation. This way there is no continuous mortar bond through
the wall to transfer heat. The cedar cordwood wall was labor intensive, but cost
little cash to build. Everyone likes the way it looks and smells. However, soon
after moving in we noticed drafts where the wood meets mortar- air infiltration.
When the wind blew rain through the wall, I knew I had to cover the outside of
the cedar.
I first used 6 mil plastic, covered with hand split oak shakes. It helped with
the infiltration, but insects found the shakes provide a good home, several
types of wasps, even a bat moved in. I finally removed the shakes and plastic,
tacked 5/8" closed cell Styrofoam board over the cedar, and stuccoed over the
entire outside wall. This stopped the insects and infiltration. I now do not
recommend cordwood walls for dwellings, as the rate of expansion/contraction
with humidity changes is very different for mortar and wood, infiltration is
inevitable, unless you tightly cover the outside wall.
Since 1985, I've been living in a solar collector-otherwise known as a direct
gain passive solar home. It is naturally well lit, thanks to many large, evenly
spaced windows on the south wall. These appropriately shaded windows allow
direct sunlight to reach the back of the building in winter, but allow no direct
sunlight inside in summer. The light which does enter strikes the textured,
brown concrete floor, slip formed stone walls, and large stone fireplace, gently
warming these surfaces which absorb and store heat, moderating temperature
fluctuations. Having insulation on the
exterior of the building allows these thermal masses to remain at or near room
temperature, absorbing heat during sunny days and radiating warmth at night.
This makes interior temperatures very stable, naturally staying warm in the
winter and cool in the summer. Because the floor and walls are doing double duty
as thermal flywheels, temperatures also remain very even throughout the house.

This simple system is effective enough to require backup heat only after cloudy
days in December, January, and February. My only backup heat is a large stone
fireplace, modeled after the high thermal mass Russian and European designs.
Mine also provides domestic hot water. My space and water heating bills are near
zero. Passive solar systems are simple in concept and use, have few or no moving
parts, require little or no maintenance, and require no external energy input.
Passive systems collect and transport heat by non-mechanical means.
Active systems employ hardware and mechanical systems to collect and store heat,
often using some outside energy source such as electricity for fans and pumps.
The greenhouse effect is most commonly demonstrated by leaving a parked car in
the sun with the windows rolled up. We all know how hot that can get because it
lacks storage. In a passive solar building, your windows are your collectors,
your walls and floor are your absorbers and storage. Water and phase change
materials can also provide storage. Typically one half to two thirds of total
surface area is masonry. An open design aids heat and light distribution.
A direct gain building is the simplest live-in solar collector-heat storage and
distribution all in one. They work well on sunny days and in cloudy climates by
collecting and using every bit of energy that passes through the glazing, direct
or diffuse. Masonry thermal storage materials include concrete, concrete block,
brick, stone and adobe.
Indirect gain is when sunlight first strikes a thermal mass, located between the
sun and the living space, commonly called a Trombe wall.
An attached greenhouse is a combination of direct and indirect gain.
Isolated gain is when collector and storage are isolated from the living space.
Temperature fluctuation can be controlled by operable windows or vents, shading
devices, and a backup heating system. Windows can still receive 90% of possible
gain when oriented within 25 degrees east or west of true south.
Incorporating solar design into a new structure is fairly simple and low cost.
My passive solar, earth sheltered, post and beam framed house cost about $8 per
square foot to build, not including labor. There are no special materials
required-just a rearranging from typical design. Looking at ordinary homes, I
usually see picture windows facing the road, when it would have been a simple
change initially to orient to the south, providing a lasting energy gain in
winter, instead of a loss. In the northern hemisphere, south facing windows
provide a net energy gain; all other directions are an energy loss.
Also, many homes are built with brick or stone on the outside of the insulated
shell, when a reversal of positions, with insulation exterior to the thermal
mass, would greatly improve the homes' thermal stability and comfort at little
or no added cost. Having heat absorbing masonry materials as part of the home's
interior structure, such as floors and walls, can reduce overall building costs,
especially when, if things are designed correctly, the need for a furnace or
boiler can be eliminated, or at least downsized.
Sometimes there are minor problems with having sunlight entering your home. At
times I find a certain chair too brightly lit for comfort, but I just move to
another. This is the advantage of spreading the windows out along the southern
wall. You have some solid wall in between windows, to minimize glare and provide
some shaded areas. I suppose the sunlight also helps fabrics fade, although I
haven't noticed this occurring. People in more populated areas may have some
privacy concerns with a lot of large windows facing their neighbors, but this
can be designed around, possibly going to a Trombe wall, or indirect gain
system.
Even though it's simpler to incorporate into a new structure, a lot can be done
with existing structures. Energy conservation must be the first step, since
there is little use collecting solar heat if you can't hold onto it.
Weather-strip and insulate, possibly adding exterior insulation. Consider
moveable insulation for doors and windows at night. A small addition of a double
door or airlock entry way can increase energy efficiency, and give you a place
for all those shoes and coats.
An attached solar greenhouse, or sunspace, can provide heat, food, beauty, and
additional room. Plants thrive in them. My 8' x 18' attached solar greenhouse
cost $250 to build, and my wife enjoyed it and what it can do for plants so much
that we now have a 22' x 48' freestanding greenhouse for her plant business.
Properly placed vegetation is also important, even for houses with no solar
aspect. Deciduous trees, shrubs or vines on the east, west, or south sides will
lose their leaves in winter to allow sunlight in, while providing cooling shade
in the summer. Evergreen foliage on the north side will buffer winter winds.

Solar hot water can be added to existing structures, as I did to my house 17
years ago. I am now well past the point where the money I invested in the solar
water heater equals the money I would have spent on electricity to heat water.
Consider the fact that in the next five to eight years you are going to pay the
cost of a solar water heater, whether you buy one or not. It's your choice-you
can invest in solar now, demonstrating your support for sustainable energy, and
getting free hot water after your payback period, or continue to pay
ever-increasing energy bills, which indicates your support for maintaining the
status quo. More on
Doug's solar water heater here ...
Passive solar design is not just about heating. Many solar design considerations
also help with summer cooling. Thermal mass resists overheating, direct earth
contact through slab-on-grade, and earth sheltering all contribute to cooling in
hot weather. The most efficient shape of building for maximum winter solar gain
is elongated along the east-west axis, giving a large south facing wall and
smaller east and west facing walls. This design also minimizes unwanted summer
heat gain on the hot east and west sides.
Radiant barrier placed in the attic or roof system can reflect 97% of radiant
heat, keeping the excess solar gain in summer from the living spaces. Light
colored roofing also helps. Vegetation is usually the best shade, because it is
later arriving in the spring, when we need more solar gain, and usually provides
shade into fall, as well as proving its own evaporative cooling effect.
There are several low-cost, low-tech devices that anyone can use, such as an
integral passive solar water heater which is basically a tank in a box. Window
box collectors, window greenhouses, and attached greenhouses can help
heat the house. Solar food dryers, cookers and ovens can also reduce utility
bills. Many of these can be homemade, inexpensively.
More on Doug's thermosyphon
water heaters here ...
As sure as the sun will rise tomorrow, our energy costs will also continue to
rise. Getting heat from sunlight is economical, ecological, dependable, readily
available, time tested, powerful and empowering. This free and equally
distributed energy source arrives at our homes almost daily. Let's all try to
make better use of it, for our own well-being as well as the planet's."
You can reach Doug at: dougkalmer
AT gmail DOT com (replace AT with @, and DOT with a period)
Doug
Jan 4, 2008
Performance of Doug's House:
This is a note that Doug posted on
the Yahoo Home Energy Solutions group. It gives an idea how well the house
performs in cold conditions:
Yesterday morning, I woke up to
4*F outside, and 2 of 3 indoor thermometers read 65*F, 3rd read 68*F. With a
short but sunny winter day yesterday, high of 33*F, warmed it up to 76*F
inside, it felt good. This morning, another 4*F reading, and 65*F inside on
2 of 3 readings, interior most thermometer reads 68*F.
This is the most extreme
conditions we face-short winter days, cold nights, and my direct gain, low
cost (<$10 sq ') passive solar home stays comfortable enough, and I now know
that I could of done better 25 years ago when I built it. I used 2" of
expanded foam board as my exterior insulation, and went to only 1" at 4' or
more below ground. I didn't protect the bead board from moisture or
termites, so I'm sure it's degraded by now, yielding less than it's original
R3 per inch. I know I have infiltration at some windows and doors. I have
some large windows that don't have nighttime insulation. Yet, the masonry
floor and walls store enough solar heat from the short day to get us
comfortably thru the long cold nights, even with these heat leaks.
Yes, the house went thru a 11*F
temperature swing, but that's very livable for us, I like it cooler at night
for sleeping, and that's the most extreme temperature swing it goes thru.
More commonly, winter temperature swings are under 10*F. This is
accomplished by having lots of surface area of masonry thermal mass directly
exposed to sunlight, which is much more effective for storing heat than mass
not in direct sun. We have not burned any wood during this extreme cold (for
us) period, and wood is our only backup heat.
Doug in TN
You can reach Doug at:
dougkalmer AT gmail DOT com (replace AT with @, and DOT with a period)
Doug's Other Projects
Doug has contributed a number of
projects to Build-It-Solar covering a wide range of solar and
renewable energy areas -- see them
all...
Thanks very much to Doug for
providing this material!


